Dockerizing a Fullstack Application crafted in MySQL, Spring Boot & React with Docker Compose
Table of contents
- What are containers and how docker comes into picture?
- What does docker compose do?
- Pre-requisites
- Setup a spring application with docker configuration
- Setup a React application with docker configuration
- Docker Compose Config
- Running the database, back-end and front-end containers in the docker network
- Resources
- Conclusion
Welcome to the core of modern development practices, where Docker Compose orchestrates a symphony for your fullstack app. As a dynamic Fullstack Software Engineer, you grasp the pivotal role containerization plays in shaping software development.
This blog is your guide to unlocking Docker Compose's potential in building a fullstack app with MySQL, Spring Boot, and React. Docker Compose acts as the linchpin, streamlining the encapsulation, and management of each component.
We'll navigate setting up a development environment within Docker containers, explore the relationship between database design and Dockerized Spring Boot backends, and witness the magic of containerized React frontends. At every step, Docker Compose ensures cohesion and consistency across the development lifecycle.
Whether you're refining containerization skills or demystifying Docker, this blog empowers both seasoned developers and curious enthusiasts. Join us as we unravel Docker Compose's potential, elevating your fullstack development experience.
Fasten your seatbelt, and let’s sail through the realms of Docker Compose-driven fullstack development. 🚢✨
What are containers and how docker comes into picture?
Containers are lightweight, portable, and self-sufficient units that encapsulate software and its dependencies. They provide a consistent and isolated environment for running applications, allowing developers to package an application along with its dependencies, libraries, and runtime into a single container image. Containers are designed to be easily deployable across various environments, ensuring consistency from development to production.
Docker is a platform that enables the creation, deployment, and management of containers. It utilizes containerization technology to package applications and their dependencies into containers. Docker provides a set of tools and a runtime environment to build, ship, and run containers efficiently.
The typical Docker workflow involves creating a Dockerfile, which defines the steps to build a container image, and then using Docker commands to build, tag, and run containers based on that image. Docker Hub is a registry service provided by Docker, where container images can be stored and shared publicly or privately.

What does docker compose do?
Docker Compose is a tool for defining and running multi-container Docker applications. It allows you to define a multi-container environment using a simple YAML file, often named docker-compose.yml, and then use a single command to start and run the entire application stack. Docker Compose is particularly useful for managing the orchestration of complex applications that require multiple services and containers to work together.

Here are some key aspects and functionalities of Docker Compose:
Declarative Configuration: Docker Compose uses a declarative YAML file to define the services, networks, and volumes required for your application. This file specifies how containers should be configured and how they should interact.
Service Definition: Each containerized component of your application is defined as a service in the
docker-compose.ymlfile. Services can include information such as the base Docker image, container name, ports to expose, environment variables, and more.Networking: Docker Compose automatically creates a network for your services, allowing containers within the same
docker-compose.ymlfile to communicate with each other using service names as hostnames.Volume Sharing: You can define volumes in the
docker-compose.ymlfile, enabling data persistence and sharing between containers. This is useful for scenarios where you want to persist data beyond the lifecycle of a single container.Environment Variables: Docker Compose allows you to set environment variables for each service, making it easy to configure different aspects of your application without modifying the container images.
Orchestration and Scaling: Docker Compose simplifies the process of orchestrating multiple containers. You can start, stop, and scale your entire application with a single command. This makes it convenient for development, testing, and even production environments.
Ease of Use: Docker Compose provides a user-friendly command-line interface, making it accessible to both developers and system administrators. Common operations like starting, stopping, and inspecting the status of services are straightforward.
Pre-requisites
Install Docker
Install Docker Compose if not already installed through the Docker installation above
 >docker -v
 Docker version 24.0.7, build afdd53b
 >docker-compose -v
 Docker Compose version v2.23.3-desktop.2
Java & Maven - The example in this blog uses Java v21 and Maven v3.9.5
Node - The example in this blog uses node v18
The project structure used for the example in this blog is as follows:-
|
|____backend
Setup a spring application with docker configuration
Create a Spring project with appropriate dependencies like Spring Web, Spring Data JPA and MySQL Driver.

Insert your MySQL configuration in the application properties
 spring.datasource.url=jdbc:mysql://localhost:3306/product
 spring.datasource.username=product
 spring.datasource.password=password
 spring.datasource.driver-class-name=com.mysql.cj.jdbc.Driver
 spring.jpa.hibernate.ddl-auto=update
// Product.java @Entity public class Product { @Id @GeneratedValue(strategy = GenerationType.IDENTITY) private Long id; private String name; private double price; // constructors, getters and setters }// ProductController.java @RestController @RequestMapping("/api/products") @CrossOrigin("*") public class ProductController { private final ProductService productService; @Autowired public ProductController(ProductService productService) { this.productService = productService; } @GetMapping public List<ResponseProductDTO> getAllProducts() { return productService.getAllProducts(); } @GetMapping("/{id}") public ResponseProductDTO getProductById(@PathVariable Long id) { return productService.getProductById(id); } @PostMapping public ResponseProductDTO saveProduct(@RequestBody RequestProductDTO product) { return productService.saveProduct(product); } @DeleteMapping("/{id}") public void deleteProduct(@PathVariable Long id) { productService.deleteProduct(id); } }The back-end should be running at localhost:8080
Setup a React application with docker configuration
Create a react app and install axios to call apis
 npm create vite@latest .
 # Select React + TypeScript
 npm install
 npm install axios
 npm run dev
The example in this blog uses a react project created by Vite, so we need to modify the
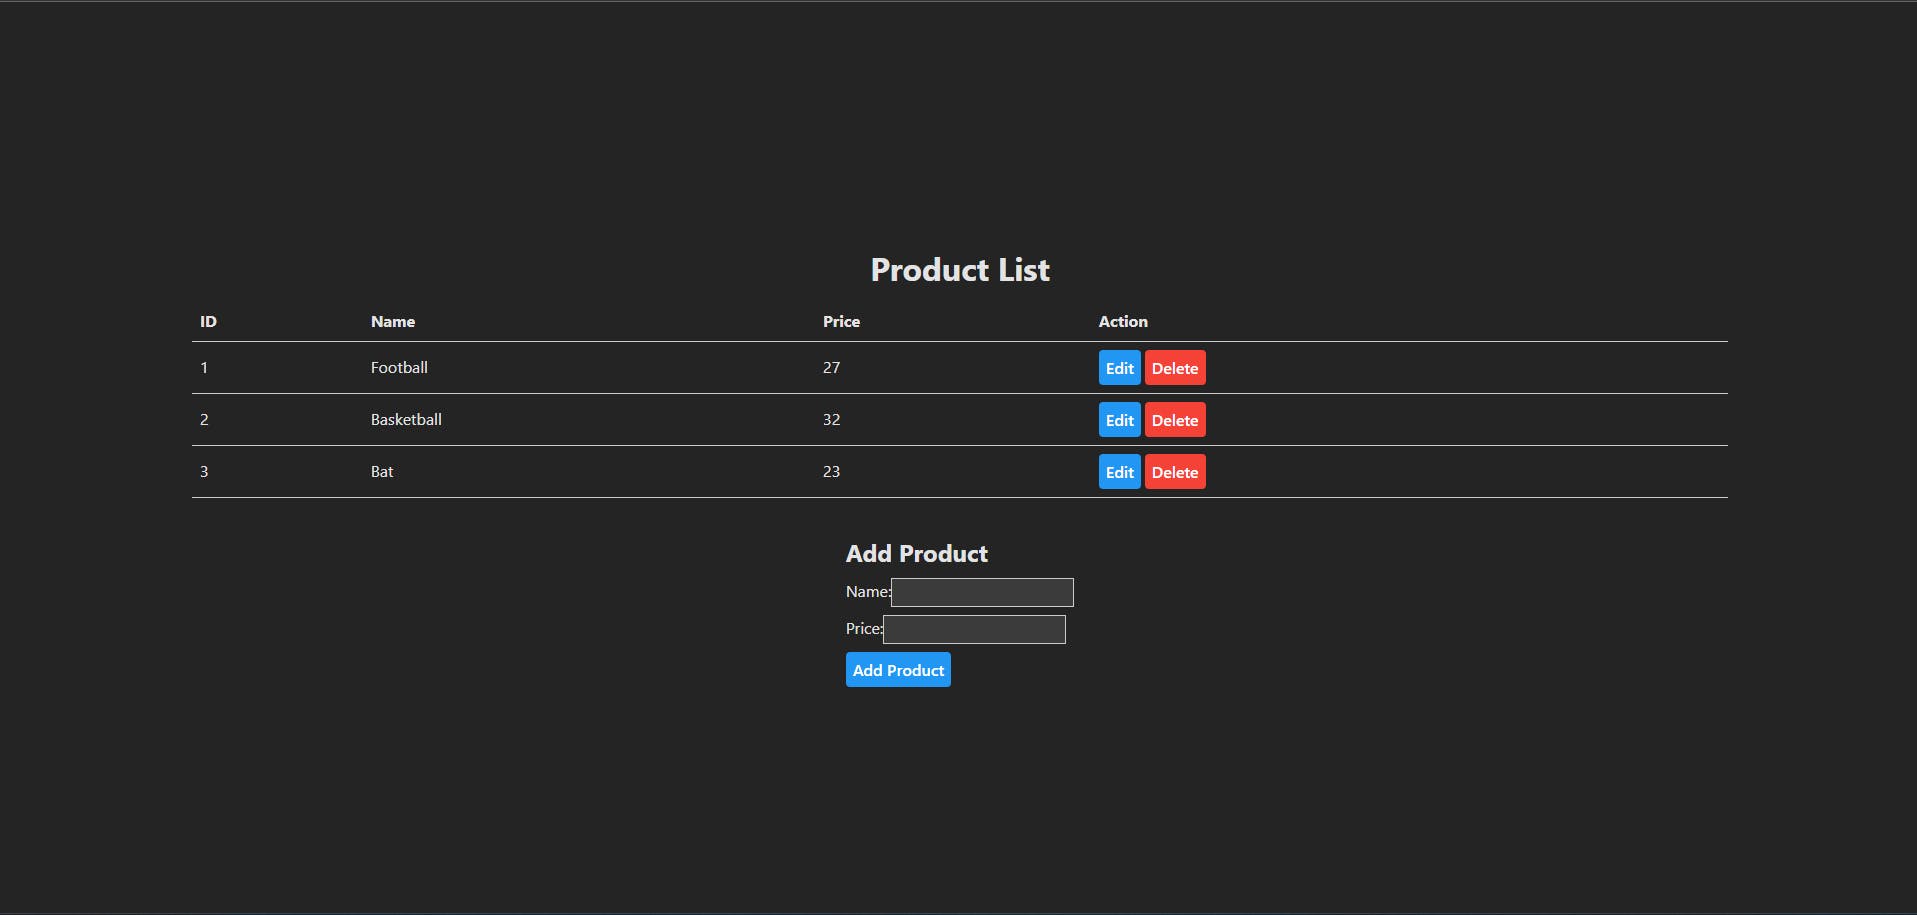
vite.config.tsto run the app on fixed port 3000 in our machine as well as in the container. Ignore this step if you are not using vite.// vite.config.ts import { defineConfig } from 'vite' import react from '@vitejs/plugin-react' // https://vitejs.dev/config/ export default defineConfig({ plugins: [react()], server: { port: 3000 }, // To allow the host to be exposed from container preview: { host: true, port: 3000 } })Create a basic html table with Edit and Delete button for each row and add new product form below the table
 // App.tsx
 import { useEffect, useState } from 'react';
 import axios from 'axios';

 type Product = {
   id: number;
   name: string;
   price: number;
 };

 const App = () => {
   const apiUrl = 'http://localhost:8080/api/products';

   const [products, setProducts] = useState<Product[]>([]);
   const [newProductName, setNewProductName] = useState('');
   const [newProductPrice, setNewProductPrice] = useState('');
   const [editProductId, setEditProductId] = useState<number | null>(null);
   const [editProductName, setEditProductName] = useState('');
   const [editProductPrice, setEditProductPrice] = useState('');

   useEffect(() => {
     fetchProducts();
   }, []);

   const fetchProducts = async () => {
     try {
       const response = await axios.get(apiUrl);
       setProducts(response.data);
     } catch (error) {
       console.error('Error fetching products:', error);
     }
   };

   const addProduct = async () => {
     try {
       const response = await axios.post(apiUrl, {
         name: newProductName,
         price: parseFloat(newProductPrice),
       });
       setProducts((prevProducts) => [...prevProducts, response.data]);
       setNewProductName('');
       setNewProductPrice('');
     } catch (error) {
       console.error('Error adding product:', error);
     }
   };

   const deleteProduct = async (id: number) => {
     try {
       await axios.delete(`${apiUrl}/${id}`);
       setProducts((prevProducts) => prevProducts.filter((product) => product.id !== id));
     } catch (error) {
       console.error('Error deleting product:', error);
     }
   };

   const startEditingProduct = (id: number, name: string, price: number) => {
     setEditProductId(id);
     setEditProductName(name);
     setEditProductPrice(price.toString());
   };

   const cancelEditingProduct = () => {
     setEditProductId(null);
     setEditProductName('');
     setEditProductPrice('');
   };

   const updateProduct = async () => {
     try {
       await axios.put(`${apiUrl}/${editProductId}`, {
         name: editProductName,
         price: parseFloat(editProductPrice),
       });
       fetchProducts();
       cancelEditingProduct();
     } catch (error) {
       console.error('Error updating product:', error);
     }
   };

   return (
     <div style={{ display: 'flex', flexDirection: 'column', alignItems: 'center', justifyContent: 'center'}}>
       <h1 style={{ fontSize: '2rem', fontWeight: 'bold', marginBottom: '1rem' }}>Product List</h1>
       <table style={{ borderCollapse: 'collapse', width: '80%', margin: 'auto' }}>
         <thead>
           <tr style={{ borderBottom: '1px solid #ccc' }}>
             <th style={{ padding: '8px', textAlign: 'left' }}>ID</th>
             <th style={{ padding: '8px', textAlign: 'left' }}>Name</th>
             <th style={{ padding: '8px', textAlign: 'left' }}>Price</th>
             <th style={{ padding: '8px', textAlign: 'left' }}>Action</th>
           </tr>
         </thead>
         <tbody>
           {products.map((product) => (
             <tr key={product.id} style={{ borderBottom: '1px solid #ccc' }}>
               <td style={{ padding: '8px', textAlign: 'left' }}>{product.id}</td>
               {editProductId === product.id ? (
                 <>
                   <td style={{ padding: '8px', textAlign: 'left' }}>
                     <input
                       style={{ border: '1px solid #ccc', padding: '6px' }}
                       type="text"
                       value={editProductName}
                       onChange={(e) => setEditProductName(e.target.value)}
                     />
                   </td>
                   <td style={{ padding: '8px', textAlign: 'left' }}>
                     <input
                       style={{ border: '1px solid #ccc', padding: '6px' }}
                       type="text"
                       value={editProductPrice}
                       onChange={(e) => setEditProductPrice(e.target.value)}
                     />
                   </td>
                 </>
               ) : (
                 <>
                   <td style={{ padding: '8px', textAlign: 'left' }}>{product.name}</td>
                   <td style={{ padding: '8px', textAlign: 'left' }}>{product.price}</td>
                 </>
               )}
               <td style={{ padding: '8px', textAlign: 'left' }}>
                 {editProductId === product.id ? (
                   <>
                     <button
                       style={{ backgroundColor: '#4CAF50', color: 'white', padding: '6px', borderRadius: '4px', marginRight: '4px' }}
                       onClick={updateProduct}
                     >
                       Update
                     </button>
                     <button
                       style={{ backgroundColor: '#ccc', padding: '6px', borderRadius: '4px' }}
                       onClick={cancelEditingProduct}
                     >
                       Cancel
                     </button>
                   </>
                 ) : (
                   <>
                     <button
                       style={{ backgroundColor: '#2196F3', color: 'white', padding: '6px', borderRadius: '4px', marginRight: '4px' }}
                       onClick={() =>
                         startEditingProduct(product.id, product.name, product.price)
                       }
                     >
                       Edit
                     </button>
                     <button
                       style={{ backgroundColor: '#f44336', color: 'white', padding: '6px', borderRadius: '4px' }}
                       onClick={() => deleteProduct(product.id)}
                     >
                       Delete
                     </button>
                   </>
                 )}
               </td>
             </tr>
           ))}
         </tbody>
       </table>
       <div style={{ marginTop: '1rem' }}>
         <h2 style={{ fontSize: '1.5rem', fontWeight: 'bold', marginBottom: '0.5rem' }}>Add Product</h2>
         <label style={{ display: 'block', marginBottom: '0.5rem' }}>
           Name:
           <input
             style={{ border: '1px solid #ccc', padding: '6px' }}
             type="text"
             value={newProductName}
             onChange={(e) => setNewProductName(e.target.value)}
           />
         </label>
         <label style={{ display: 'block', marginBottom: '0.5rem' }}>
           Price:
           <input
             style={{ border: '1px solid #ccc', padding: '6px' }}
             type="text"
             value={newProductPrice}
             onChange={(e) => setNewProductPrice(e.target.value)}
           />
         </label>
         <button
           style={{ backgroundColor: '#2196F3', color: 'white', padding: '6px', borderRadius: '4px' }}
           onClick={addProduct}
         >
           Add Product
         </button>
       </div>
     </div>
   );
 };

 export default App;
The front-end should be running at localhost:3000
Add some demo data to test the connection

Docker Compose Config
Create a
Dockerfilein backend directory# Stage 1: Build the application using Maven FROM maven:3.9.5 AS build # Set the working directory within the container to /app WORKDIR /app # Copy all files from the current directory (.) to the container's working directory (/app) COPY . . # Run the Maven clean install command RUN mvn clean install # Stage 2: Create a lightweight container with only the necessary artifacts FROM openjdk:21 # Set the working directory within the container to /app WORKDIR /app # Copy the built JAR file from the previous stage into the current stage COPY --from=build /app/target/*.jar server.jar # Expose port 8080 to allow external connections to the application EXPOSE 8080 # Specify the command to run when the container starts - run the Java application using the JAR file CMD ["java", "-jar", "server.jar"]Create a
Dockerfilein frontend directory# Stage 1: Build the Node.js application FROM node:18-alpine as BUILD # Set the working directory within the container to /app WORKDIR /app # Copy package.json to the container's working directory COPY package.json . # Install dependencies based on package.json RUN npm install # Copy all files from the current directory (.) to the container's working directory (/app) COPY . . # Build the application RUN npm run build # Stage 2: Create a lightweight container for production FROM node:18-alpine as PROD # Set the working directory within the container to /app WORKDIR /app # Copy the build artifacts (dist folder) from the BUILD stage to the current stage COPY --from=BUILD /app/dist/ /app/dist/ # Expose port 3000 to allow external connections to the application EXPOSE 3000 # Copy package.json and vite.config.ts to the container's working directory COPY package.json . COPY vite.config.ts . # Install TypeScript RUN npm install typescript # Specify the command to run when the container starts - run the application in preview mode CMD [ "npm", "run", "preview" ]Add a .dockerignore in the frontend directory to restrict node_modules directory to hold up space
node_modules/We can update the
application.propertiesin the backend to support dynamic environment variables now.spring.datasource.url=${SPRING_DATASOURCE_URL} spring.datasource.username=${SPRING_DATASOURCE_USERNAME} spring.datasource.password=${SPRING_DATASOURCE_PASSWORD} spring.datasource.driver-class-name=com.mysql.cj.jdbc.Driver spring.jpa.hibernate.ddl-auto=update
In the project source directory i.e. docker-compose-demo directory, we need to add a docker-compose.yml. The environment variables should be appropriately used in the docker-compose.yml and application.properties.
# Specify the version of the Docker Compose file format
version: '3.8'

# Define the services that will run in your application
services:

  # Configuration for the MySQL database service
  database:
    # Use the MySQL 8 Docker image
    image: mysql:8
    environment:
      # Set the root password for MySQL
      MYSQL_ROOT_PASSWORD: password
      # Specify the name of the database to be created
      MYSQL_DATABASE: product
      # Specify the MySQL user and its password
      MYSQL_USER: product
      MYSQL_PASSWORD: password
    volumes:
      # Mount a volume to persist MySQL data
      - mysql_data:/var/lib/mysql

  # Configuration for the backend application
  server:
    # Build the server image using the Dockerfile in the ./server directory
    build:
      context: ./backend
    # Expose port 8080 on the host and map it to port 8080 in the container
    ports:
      - "8080:8080"
    environment:
      # Set the Spring DataSource URL to connect to the MySQL database service
      SPRING_DATASOURCE_URL: jdbc:mysql://database:3306/product
      # Set the username for connecting to the MySQL database
      SPRING_DATASOURCE_USERNAME: product
      # Set the password for connecting to the MySQL database
      SPRING_DATASOURCE_PASSWORD: password
    # Depend on the database service, ensuring it starts before the server
    depends_on:
      - database

  # Configuration for the frontend application
  client:
    # Build the client image using the Dockerfile in the ./client directory
    build:
      context: ./frontend
    # Expose port 3000 on the host and map it to port 5173 in the container
    ports:
      - "3000:3000"
    # Depend on the server service, ensuring it starts before the client
    depends_on:
      - server

# Define a volume named mysql_data for persisting MySQL data
volumes:
  mysql_data:
Running the database, back-end and front-end containers in the docker network
Run the following command to create images of mysql, server and client services provided in
docker-compose.yml, create and run the images in containers in a single network in detached mode i.e. run the containers in the background, detached from the terminaldocker-compose up -dThe command line should look something like this which shows the execution of the
docker-compose.ymlfile by the configuration we provide by properties likeports,depends_on, etc.
We should be able to see the containers running in a single network in out Docker desktop app.

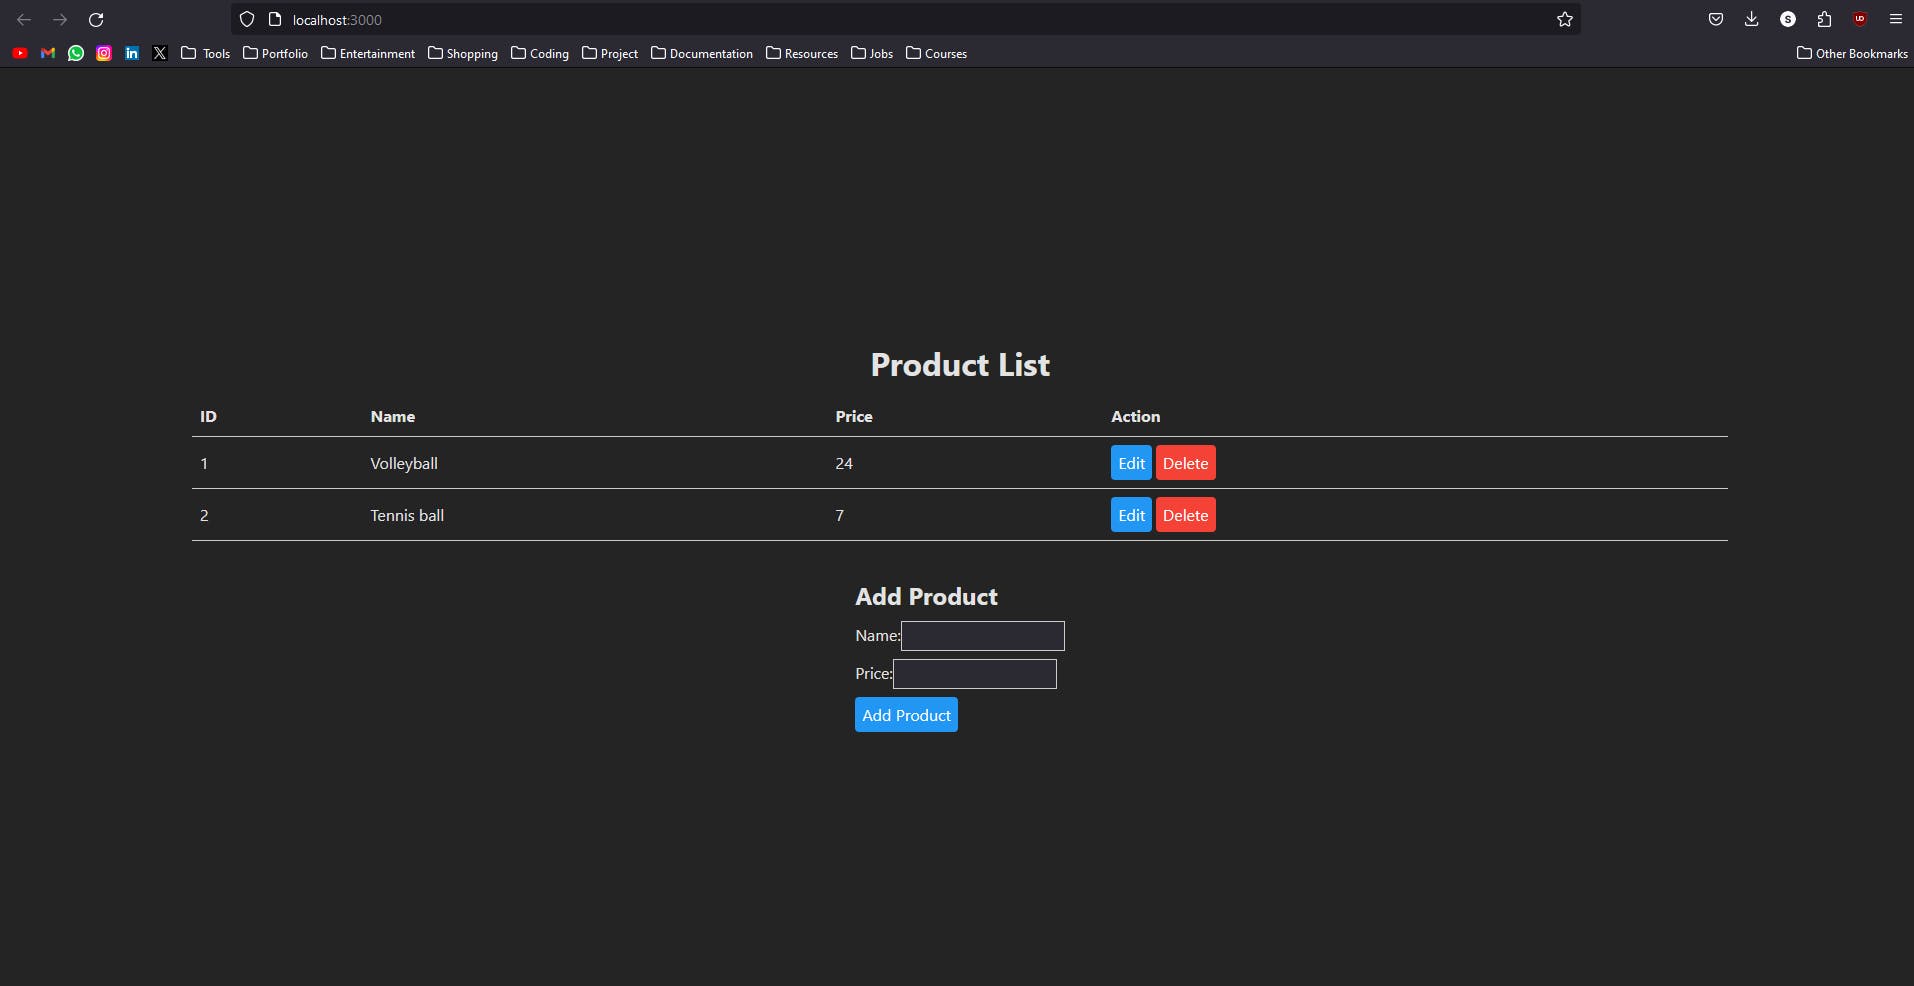
The backend and frontend servers should be running on the ports we assigned in the
docker-compose.ymlfile.
We can use the following command to stop and remove the containers.
docker-compose downIf we restart our containers again by
docker-compose up -d, we should have our inserted data from before since we provided a volume namedmysql_dataindocker-compose.ymlfor persisting MySQL data.
Resources
Github repository to the provided example - Docker Compose Demo
Conclusion
In conclusion, this blog covered the fundamental concepts of containers and how Docker facilitates their creation, deployment, and management. It delved into the role of Docker Compose as a tool for orchestrating multi-container Docker applications, emphasizing its declarative configuration, service definition, networking, volume sharing, environment variable setup, and ease of use.
The blog provides streamlined steps for configuring a Spring backend and a React frontend application with Docker, along with Dockerfiles for building container images. The Docker Compose configuration file is introduced briefly, emphasizing service setups and volume usage for data persistence.
The concluding section briefly guides readers on running the entire application stack with Docker Compose, underscoring the importance of volumes in persisting data.
In essence, this blog serves as a quick reference for developers seeking practical insights into containerization using Docker and Docker Compose, offering a simplified guide for a multi-container application environment.

