Code, Cloud and Coffee: Deploying a MySQL, Spring and React application on AWS Free Tier with CI/CD through GitHub Actions
Greetings! 🚀 I'm a dynamic Fullstack Software Engineer, driving advancements in technology to empower organizations globally. Proficient in a diverse tech stack, I contribute to the architecture and development of high-performance applications. Beyond coding, I thrive on creating empowering and collaborative environments, championing technological innovation, and fostering connections to push the boundaries of excellence. As a Gamer🎮, and a Footballer⚽️, I bring passion to both my professional and personal pursuits. A Wanderlust🛣️ enthusiast and Orophile⛰️, I thrive on exploring diverse landscapes. A Melomane🎵 and avid TV😍 enthusiast, I find joy in the finer aspects of life. Also, a proud enthusiast of Tea☕️ who appreciates bike rides, beaches, and mountains alike. Always eager to connect with like-minded professionals and individuals who share a zest for technology, innovation, and life's adventures. Let's push boundaries together! 🌐
Introduction
Embarking on the AWS Free Tier journey, I set out to weave a tapestry of technology by deploying a full-stack application, combining the power of MySQL, Spring, and React. This blog serves as a chronicle of my exploration into the world of cloud computing, where budget constraints met the ambition to create a robust and dynamic web application.
In the realm of databases, I opted for Amazon RDS to host my MySQL database, leveraging its managed services to streamline administration tasks. On the backend, an EC2 instance powered by Spring provided the backbone for my application's logic and data processing. For the frontend, the user interface found its home on AWS Amplify, simplifying the deployment of my React application with a focus on scalability and ease of use.
This journey wasn't just about deploying code; it was a navigation through the intricate landscape of AWS services, striking a balance between functionality and frugality. Join me as I unravel the threads of my experience, sharing the triumphs, challenges, and lessons learned in the pursuit of a fully functional, cost-effective full-stack application on the AWS Free Tier. Let this be a guide for those venturing into the cloud, where innovation meets the constraints of a tight budget. Welcome to the story of MySQL, Spring, and React on AWS Free Tier.
AWS Services used
For the database, I chose Amazon RDS (Relational Database Service) to manage the MySQL database. RDS simplifies database management with automated backups, patching, and scalability features. The benefits include reduced operational overhead, easy scalability, and enhanced security through encryption. However, the AWS Free Tier imposes limitations on instance types and storage, which may require monitoring to avoid additional charges.
On the server side, Amazon EC2 (Elastic Compute Cloud) was employed for hosting the Spring application on a docker container. EC2 provides scalable compute capacity with full control over virtual machines. This allows customization and flexibility in choosing instance types based on application needs. While the AWS Free Tier offers limited hours of t2.micro instances per month, additional charges may apply for data transfer and storage beyond the allotted limits.
For the frontend, AWS Amplify was selected to streamline React application deployment. Amplify simplifies the development process with automatic deployment, hosting on a global CDN, and a user-friendly CI/CD pipeline. Its benefits include quick setup and integration with other AWS services. However, limitations in build minutes and storage on the Free Tier, along with potential charges for data transfer out of the hosting environment, should be considered when utilizing Amplify for hosting the frontend.
Architecture
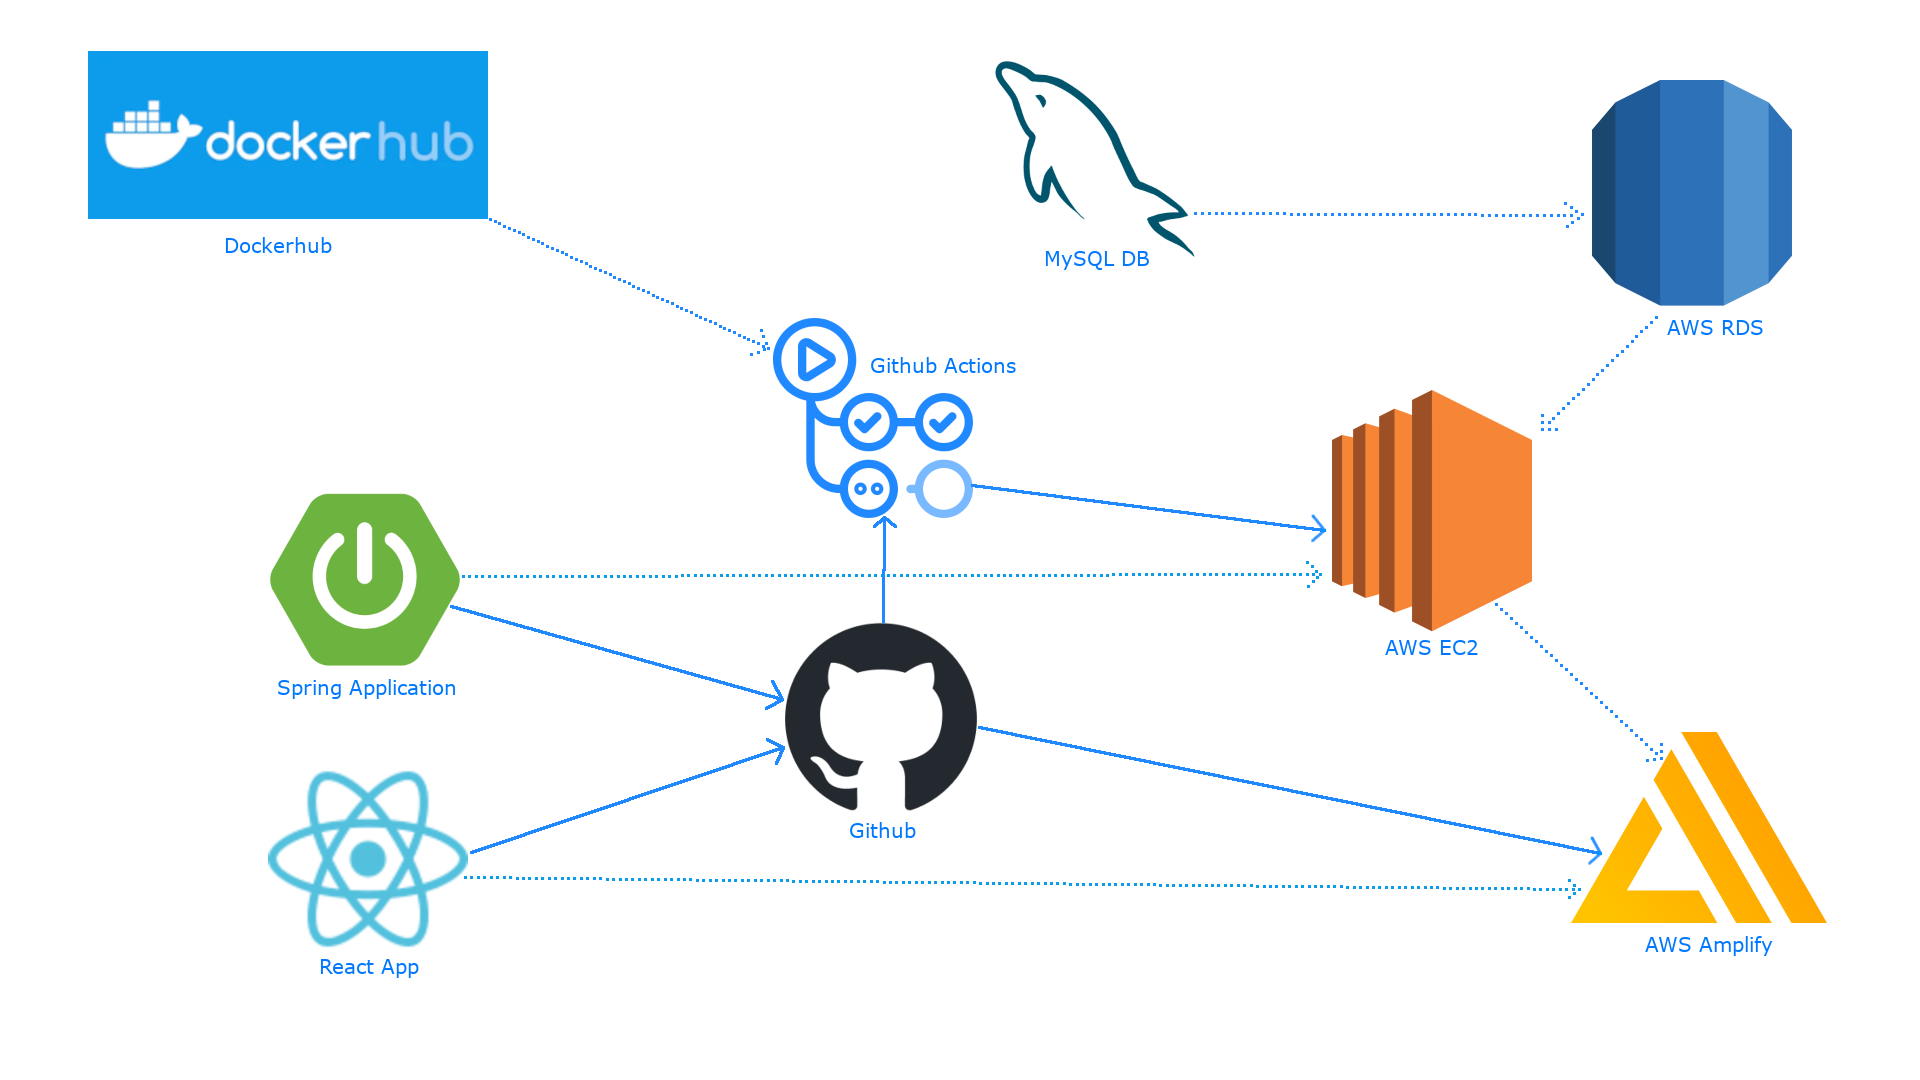
Our application's architecture is a sophisticated ecosystem designed for seamless interaction between its integral parts. The backbone of our backend data storage is the MySQL database hosted on Amazon RDS, offering scalability and managed services. Meanwhile, the application's logic resides in a Spring backend, encapsulated within a Docker container on an EC2 instance. This environment is orchestrated by Docker, intricately configuring the MySQL and the Spring application to communicate flawlessly over the EC2 and RDS.
The orchestration reaches its crescendo with the Continuous Integration and Continuous Deployment (CI/CD) workflow facilitated by GitHub Actions. Whenever code changes are pushed to our GitHub repository, the orchestrated symphony begins. A self-hosted runner on the EC2 instance takes center stage, fetching the latest changes and seamlessly updating our Spring backend. This ensures that our backend remains cutting-edge with every push.
Simultaneously, the frontend undergoes a transformation of its own. The React frontend code, residing in our GitHub repository, is automatically deployed to AWS Amplify, a platform offering scalable and managed hosting for our frontend. This dynamic deployment process guarantees that our users experience the most up-to-date version of our application without any manual intervention.
The Github Actions will utilize 3 workflows. First for Continuous Integration which will be triggered on every push to the repository, second for building the back-end app docker image and pushing it to our private dockerhub repository and the last one for continuous delivery which will begin execution when the second workflow completes execution. The continuous delivery workflow will be run on a self-hosted runner which will be running on the ec2 instance. It will pull the lastest uploaded backend app image and run it in a container.
In essence, this intricate dance of technologies integrates AWS services, Docker containerization, and robust CI/CD practices into a harmonious system. Each component plays a crucial role, contributing to the continuous deployment and enhancement of our full-stack application. This carefully orchestrated architecture not only ensures a smooth and automated workflow but also lays the foundation for a scalable and efficient application ecosystem.
Repository Structure
Link - https://github.com/saurabhthecodewizard/opus
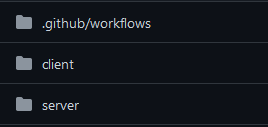
This is how the folder structure will look like for this example.
The
serverfolder will have spring application code.The
clientfolder will have react app code.The
.github/workflowswill have the CI/CD workflows
RDS Setup for Database
Navigate to the AWS Management Console and open the Amazon RDS dashboard.
Click on the "Create database" button.
Choose the "Standard create" method.
In the "Engine options" section, select "MySQL" as the database engine and choose the latest engine version available.
Under "Templates," select "Free Tier" to ensure the usage falls within the free tier limits.
Provide a unique DB instance identifier of your choice.
Set a username and password for the database credentials, as these will be needed for connecting to the database.
Choose the "db.t4g.micro" instance type under "Free tier" to stay within the free tier limits.
For storage, select "gp2" as the storage type and select 20 GB storage since 20 GB is allocated for free tier, and uncheck the "Enable storage auto scaling" option.
In the "Connectivity" section, choose "Don't connect to an EC2 compute resource" and allow public access, as the database will be accessed locally and later from the EC2 instance.
Select the security group with EC2, RDS and AdministratorAccess.
Under the "Database authentication" section, choose "Password authentication."
In the "Additional configuration" section, uncheck "Automated backups," "Encryption," and "Minor version upgrade."
It may show you estimated cost, but we should be good as long as we are on free tier.
Finally, click on the "Create database" button to initiate the creation of the MySQL RDS instance.
Development Setup
Develop a Spring application in the
serverfolder with a simple API fetching data from the database, using the RDS database configuration (The RDS database url can be take from endpoint from RDS instance details and the username and password should be the one you setup during the RDS instance creation).This project uses flyway migrations for versioning the database. More information can be found here - https://www.baeldung.com/database-migrations-with-flyway
# application.properties

# Database configuration
spring.datasource.url=${SPRING_DATASOURCE_URL}
spring.datasource.username=${SPRING_DATASOURCE_USERNAME}
spring.datasource.password=${SPRING_DATASOURCE_PASSWORD}
spring.jpa.show-sql=true
# Flyway configuration
spring.flyway.baseline-on-migrate=true
spring.flyway.locations=classpath:db/migration
- I have added a
clientstable and a single entity to it in the migration.
-- V1697817392__add_opus_to_clients.sql
CREATE TABLE clients (
    id SERIAL PRIMARY KEY,
    name VARCHAR(255) NOT NULL,
    create_date DATE,
    status TINYINT(1), -- 1 for true (active), 0 for false (inactive)
    website VARCHAR(255),
    picture_url VARCHAR(255)
);

INSERT INTO clients (name, create_date, status, website, picture_url)
VALUES ('Opus', '2023-10-20', 1, 'https://www.opus.com', 'https://www.opus.com/image.jpg');
- Add an endpoint for us to test the application
// Controller.java

@GetMapping("/")
public ClientDTO getOpus() {
    return clientService.getClientById(1L);
}
The api should be working now which will fetch our client entity from the rds instance
Docker Setup - Backend
- Create a
Dockerfileto./serverdirectory.
# ./server/Dockerfile
# Use the Maven 3.9.5 image as the build environment
FROM maven:3.9.5 AS build

# Set the working directory within the container to /app
WORKDIR /app

# Copy the content of the current directory into the /app directory in the container
COPY . .

# Run Maven to clean and install dependencies
RUN mvn clean install

# Use the OpenJDK 21 image as the base image for the final container
FROM openjdk:21

# Set the working directory within the container to /app
WORKDIR /app

# Copy the compiled JAR file from the build stage to the /app directory in the final container
COPY --from=build /app/target/*.jar server.jar

# Expose port 8080 to allow external connections
EXPOSE 8080

# Define the default command to run the Java application
CMD ["java", "-jar", "server.jar"]
You can test this by running the image locally by the following commands in the ./server directory
- Build the server image
docker build -t server .
You can see if the image is built successfully by running
docker image lsor in docker desktop app.Run the image in container with appropriate port mapping and appropriate environment variables in the command
docker run -d -p 8080:8080 -e SPRING_DATASOURCE_URL=${DB_URL} -e SPRING_DATASOURCE_USERNAME=${DB_USERNAME} -e SPRING_DATASOURCE_PASSWORD=${DB_PASSWORD} -e SPRING_MAIL_USERNAME=${SPRING_MAIL_USERNAME} -e SPRING_MAIL_PASSWORD=${SPRING_MAIL_PASSWORD} --name server-container server
You can see the container running docker container ls or in the docker desktop app.
Github Secrets
Add the following github secrets which we will be using in our workflows for CI/CD as shown in the picture below.

Github Actions Setup
We will be creating 3 files in the .github/workflows directory.
Continuous Integration -
server-intergartion.yml:-This GitHub Actions workflow file named "Server Integration" is triggered on each push event. The workflow runs on the latest version of Ubuntu and is configured to execute within the 'server/' directory. It sets environment variables for sensitive information such as database connection details and email credentials using GitHub Secrets. The workflow consists of three main steps: it checks out the source code, sets up Java 17 using the Temurin distribution, and builds the project using Maven. The Maven build command includes parameters for configuring the Spring datasource URL, username, password, as well as the email username and password, all sourced from the environment variables. This workflow is designed for integrating and building a Java server application with secure and customizable database and email configurations.
 # .github/workflows/server-intergartion.yml

 name: Server Integration

 on: [push]

 jobs:

   build:

     runs-on: ubuntu-latest
     defaults:
       run:
         working-directory: server/
     env:
         DB_URL: ${{ secrets.DB_URL }}
         DB_USERNAME: ${{ secrets.DB_USERNAME }}
         DB_PASSWORD: ${{ secrets.DB_PASSWORD }}
         SPRING_MAIL_USERNAME: ${{ secrets.SPRING_MAIL_USERNAME }}
         SPRING_MAIL_PASSWORD: ${{ secrets.SPRING_MAIL_PASSWORD }}
     steps:
     - name: Checkout source
       uses: actions/checkout@v3
     - name: Setup Java
       uses: actions/setup-java@v3
       with:
         distribution: 'temurin'
         java-version: '17'
     - name: Build Project
       run: mvn clean install -D spring.datasource.url=${DB_URL} -D spring.datasource.username=${DB_USERNAME} -D spring.datasource.password=${DB_PASSWORD} -D spring.mail.username=${SPRING_MAIL_USERNAME} -D spring.mail.password=${SPRING_MAIL_PASSWORD} -B
Server Build -
server-build.yml:-This GitHub Actions workflow file, named "Server Build," is configured to run on a manual workflow_dispatch event. The workflow is designed to build a Java server application and deploy it as a Docker image to Docker Hub. It runs on the latest version of Ubuntu, within the 'server/' directory. It utilizes environment variables, sourced from GitHub Secrets, for sensitive information such as Docker Hub credentials, database connection details, and email credentials. The workflow includes several steps: it checks out the source code, sets up Java 17 using the Temurin distribution, builds the project with Maven, logs in to Docker Hub, builds a Docker image tagged as 'skmahajan4998/opus-app:latest,' pushes the image to Docker Hub, and finally, deletes dangling Docker images to free up space. This workflow automates the process of building and deploying the server application with Docker, ensuring secure and efficient deployment practices.
 # .github/workflows/server-build.yml

 name: Server Build

 on: workflow_dispatch

 jobs:

   build:

     runs-on: ubuntu-latest
     defaults:
       run:
         working-directory: server/
     env:
       DOCKER_USERNAME: ${{secrets.DOCKER_USERNAME}}
       DOCKER_PASSWORD: ${{secrets.DOCKER_PASSWORD}}
       DB_URL: ${{ secrets.DB_URL }}
       DB_USERNAME: ${{ secrets.DB_USERNAME }}
       DB_PASSWORD: ${{ secrets.DB_PASSWORD }}
     steps:
     - name: Checkout source
       uses: actions/checkout@v3
     - name: Setup Java
       uses: actions/setup-java@v3
       with:
         distribution: 'temurin'
         java-version: '17'
     - name: Build Project
       run: mvn clean install -D spring.datasource.url=${DB_URL} -D spring.datasource.username=${DB_USERNAME} -D spring.datasource.password=${DB_PASSWORD} -B
     - name: Login Dockerhub
       run: docker login -u $DOCKER_USERNAME -p $DOCKER_PASSWORD
     - name: Build the Docker image
       run: docker build -t skmahajan4998/opus-app .
     - name: Push to Dockerhub
       run: docker push skmahajan4998/opus-app:latest
     - name: Delete Dangling docker images
       run: docker image prune -f
Continuous Deployment -
server-deploy.yml:-This GitHub Actions workflow file, named "Server Deploy," is triggered on the completion of the "Server Build" workflow. It runs on a self-hosted runner which will be hosted on our ec2 instance and is responsible for pulling the latest Docker image of the server application from Docker Hub, stopping and removing any existing container with the name 'opus-app-container,' and then running a new container with the pulled image. The environment variables for database connection details and email credentials are provided to the Docker container during the run. Specifically, the Docker container is started in detached mode (-d), mapped to port 8080 on the host, and named 'opus-app-container.' This workflow facilitates the deployment of the server application by updating the running container with the latest version of the application, ensuring a smooth and automated deployment process after the successful completion of the build workflow.
 #
 name: Server Deploy

 on:
   workflow_run:
     workflows: ["Server Build"]
     types:
       - completed

 jobs:

   pull:
     runs-on: self-hosted
     env:
       DB_URL: ${{ secrets.DB_URL }}
       DB_USERNAME: ${{ secrets.DB_USERNAME }}
       DB_PASSWORD: ${{ secrets.DB_PASSWORD }}
     steps:
     - name: Pull Docker Image
       run: sudo docker pull skmahajan4998/opus-app:latest
     - name: Delete Old Docker Container
       run: sudo docker rm -f opus-app-container || true
     - name: Run Docker Container
       run: sudo docker run -d -p 8080:8080 -e SPRING_DATASOURCE_URL=${DB_URL} -e SPRING_DATASOURCE_USERNAME=${DB_USERNAME} -e SPRING_DATASOURCE_PASSWORD=${DB_PASSWORD} --name opus-app-container skmahajan4998/opus-app
EC2 setup for back-end
Sign in to the AWS Management Console.
Open the EC2 dashboard.
Click on the "Instances" link in the left navigation pane.
Click the "Launch Instances" button.
Select Ubuntu Server
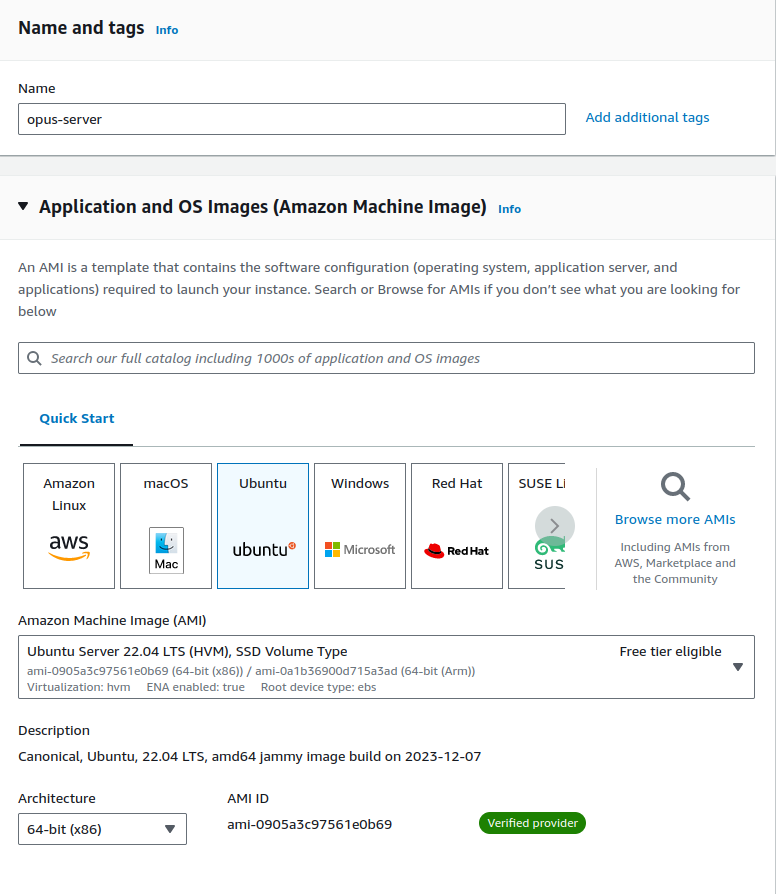
- Select
t2.microto stay in the free tier
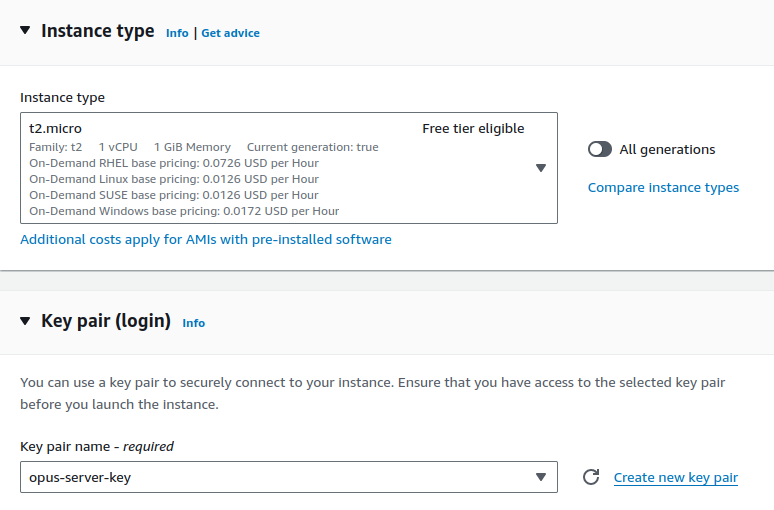
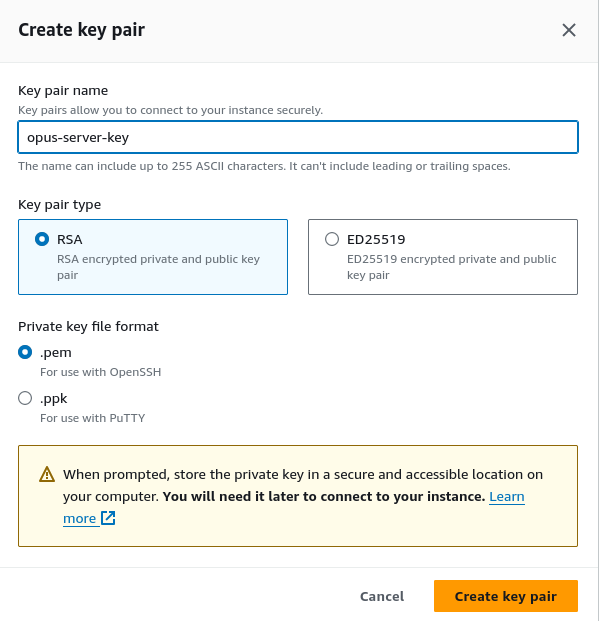
- Create a Key pair of
.pemtype so we can login through SSH
Allow HTTP/HTTPS traffic from internet.
Launch the instance.
Change the inbound rules as given below

Github Runner setup on EC2
Navigate to
.pemfilecd /path/to/directory/with/pem/fileConnect to EC2 instance through SSH client
Replace
your-instance-ipwith the actual public IP address of your EC2 instance andyour-key-file.pemwith the name of your .pem file. You can find this command when you click on connect instance and navigate to SSH client on AWS management console.chmod 400 "your-key-file.pem" ssh -i "your-key-file.pem" ubuntu@your-instance-ipIf there are no errors, you should successfully establish a connection to your EC2 instance.
Update the package list on your EC2 instance
sudo apt updateUpgrade the installed packages on your EC2 instance. The
-yflag automatically confirms the upgrade.sudo apt-get upgrade -yThe upgrade process should now be complete, and your EC2 instance is up-to-date.
Create Github Runner
Navigate to Github Repository ->
Settings->Actions->Runners.Click on
Add a runnerand selectlinuxOSYou should be able to see commands in 2 sections, namely,
DownloadandConfigureEnsure that you have Github secrets setup as shown in the Github Secrets section
Run all the commands provided through the
DownlaodandConfiguresection of the github runner on our EC2 instance that we previously connected through SSH client.Run the
./run.shscript in the background using the&operator to keep the process running in the background while freeing up the terminal.Confirm runner connection
Go back to your GitHub repository.
Navigate to
Settings->Actions->Runners.Refresh the page to check if the runner is connected.
The runner status should show as
Idlewith a green dot, indicating that it is ready to execute workflows.You can also check the terminal where you ran the runner script to ensure there are no errors and that the runner is connected successfully.
Your GitHub Runner should now be set up, configured, and connected to your repository. It is ready to execute workflows when triggered.
Install Docker on EC2 instance
Run the commands provided on the documentation - https://docs.docker.com/engine/install/ubuntu/
Login to docker with your credentials
sudo docker loginNo containers will be present currently. You can check by the below command.
sudo docker ps
Trigger the CI/CD flow
Push our code to the repository (This should automatically trigger the
Server Buildworkflow).Trigger the
Server Buildworkflow manually through github actions.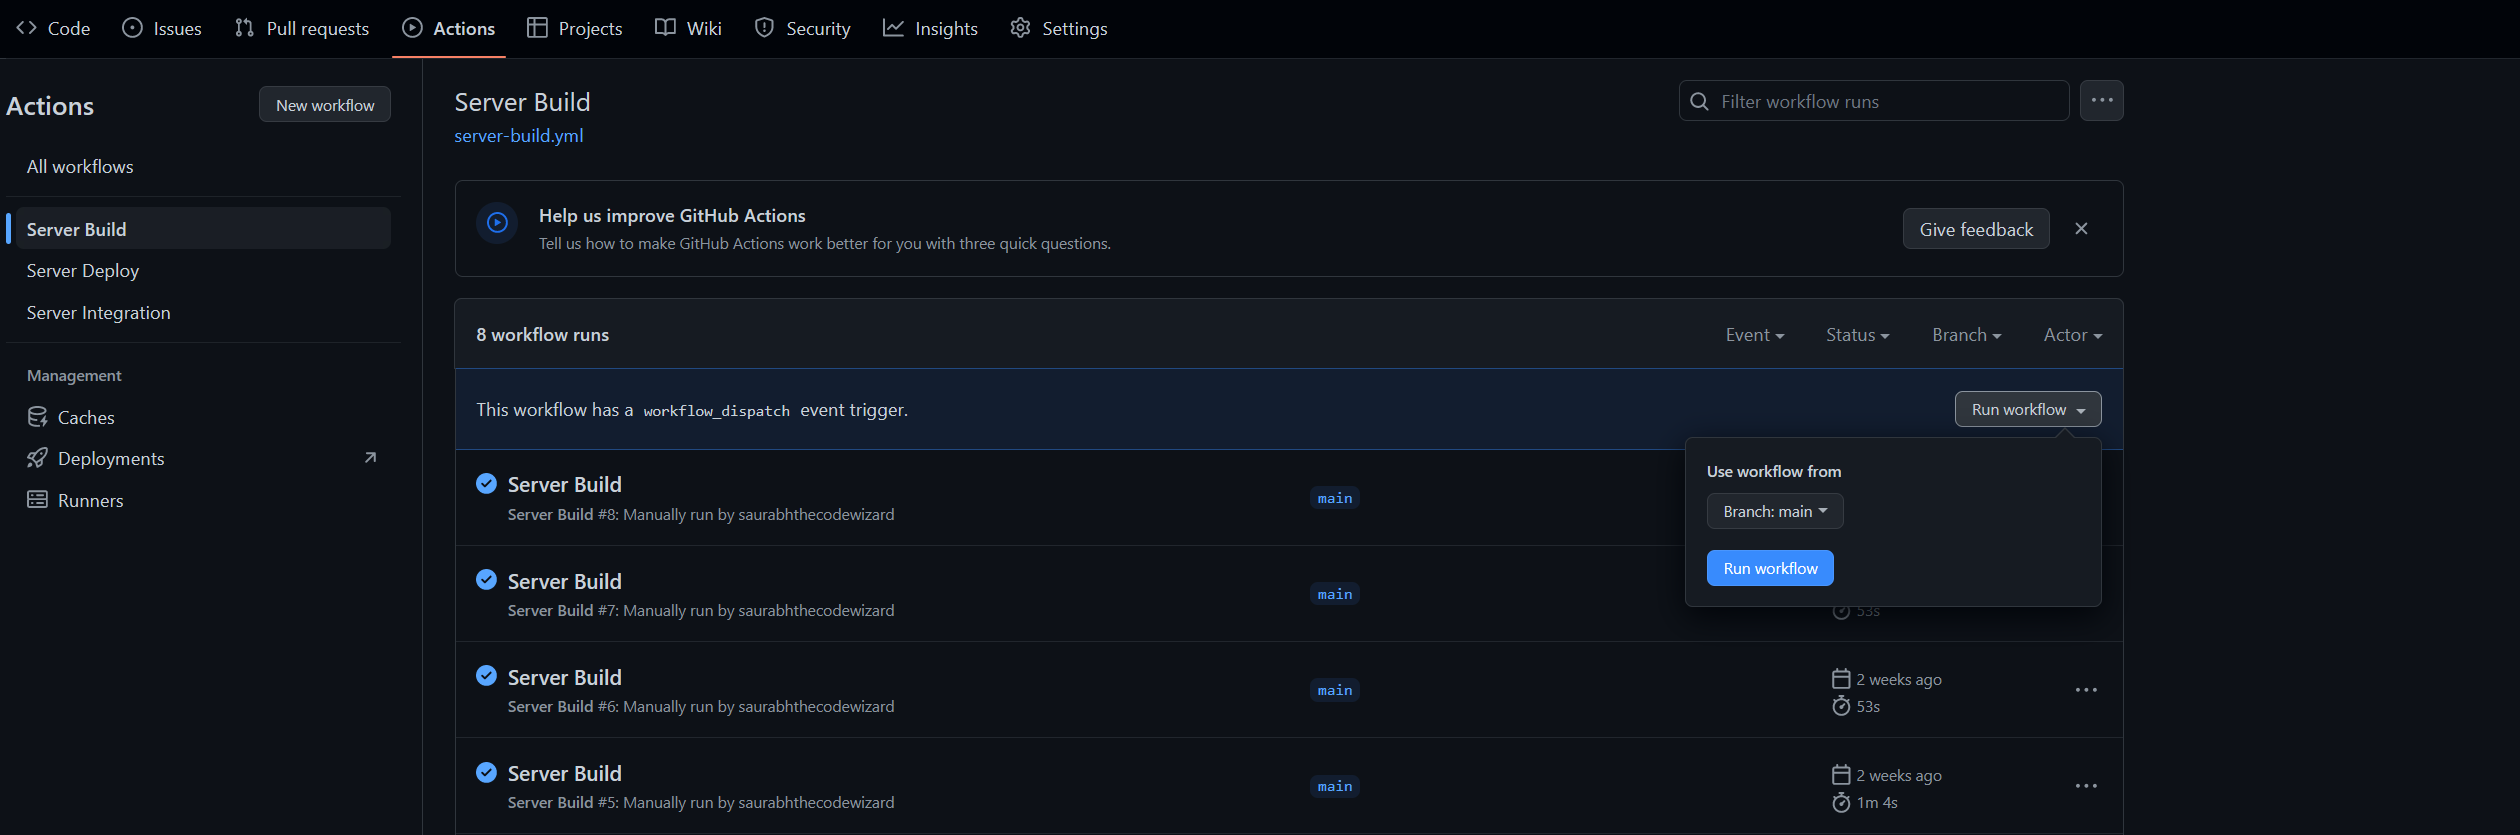
The successful completion of
Server Buildworkflow should automatically trigger theServer Deployworkflow.
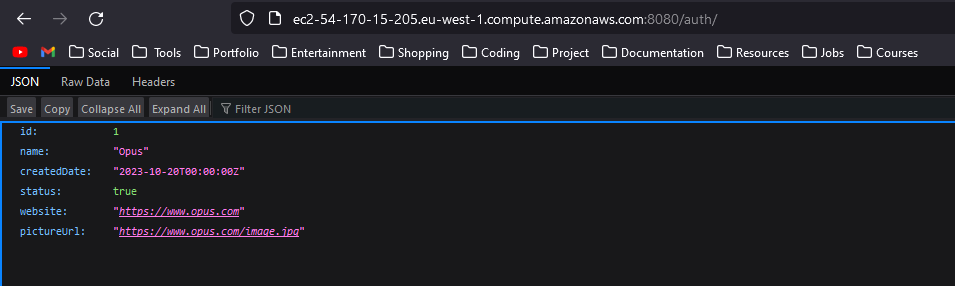
Note: If you have any errors in the server build or server integration, you will have to solve those locally and then trigger the CI/CD again.Your latest server build should now be successfully deployed on the EC2 instance and you can check by triggering the api we provided.
curl 0.0.0.0:8080/You can also check the depoloyment by calling the api through browser with appropriate url. You can get the public IP from instance details and the rest of the api url as you configured in the spring application.
Setup nginx server on EC2 for proxy
Run the following commands on EC2 instance
Install nginx
 sudo apt update
 sudo apt install -y nginx
Get Docker container IP
Find the IP address of your Docker container using the following command. ReplacecontainerIdwith the actual ID. You can find the docker container id by runningdocker container ps.docker inspect -f '{{range .NetworkSettings.Networks}}{{.IPAddress}}{{end}}' containerIdNavigate to nginx sites-available directory
cd /etc/nginx/sites-available/Edit the default configuration
sudo nano defaultIn the
location / { ... }block, add the following line with the appropriate IP address and port:location / { proxy_pass http://172.17.0.2:8080; # Replace with your Docker container's IP and port # Other proxy settings can be added here if needed }Restart nginx
sudo systemctl restart nginxCheck the Nginx configuration for syntax errors
sudo nginx -tIf there are no errors, you should see
nginx: configuration file /etc/nginx/nginx.conf test is successful.Nginx is now configured as a reverse proxy for your Docker container. Requests to the Nginx server will be forwarded to the Docker container. Make sure to replace the placeholder IP address and port with the actual values from step 2.
Setup HTTPS on EC2
You can setup HTTPS on EC2 if you have custom domain. Follow this process if you do not have custom domain.
Now, install Caddy on the server. Instructions can be found here. Caddy 2 is a powerful open source web server with automatic HTTPS. Caddy simplifies your infrastructure and takes care of TLS certificate renewals.
 yum install yum-plugin-copr
 yum copr enable @caddy/caddy
 yum install caddy
Next we'll create a
Caddyfilewith the following contents(Insert your ec2 public ip).<EC2 Public IP>.nip.io { reverse_proxy localhost:8080 }Over here, we are using nip.io as a DNS. nip.io allows you to map any IP Address to a hostname without the need to edit a hosts file or create rules in DNS management. nip.io maps .nip.io in "dot", "dash" or "hexadecimal" notation to the corresponding .
What we are doing here is basically setting up a proxy to forward all requests to port 8000 of our instance. Save the file as
Caddyfileand run the commandcaddy run.This will start Caddy certificate management service and download a certificate for the indentifier
<IP>.nip.io.Now if you go to your address
<IP>.nip.iowith the ec2 url in the browser you'll see that the connection is secure and the browser no longer complains about insecure connections.If you want to run Caddy in background all you have to do is run
caddy start.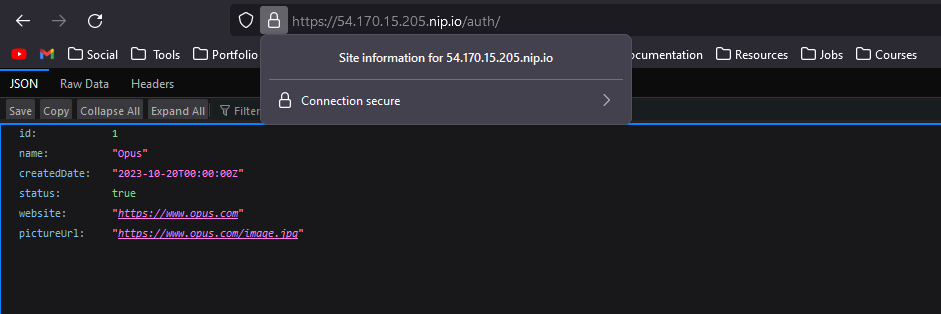
Front-end setup on AWS Amplify
Create a basic react app and consume the api we created in the Spring application with the ec2 URL
Navigate to AWS Amplify on AWS management console.
New app -> Host a web app
Select Github
Authorize the repository -> Select your repository -> Select your branch
(Optional) -> If the frontend application is not in the root directory, mention the correct directory of the app in the folder section
Next -> Next -> Save and Deploy
Note: You may need to make changes to the build commands or your react app based on the packages and libraries you are using
You can setup the backend url in environment variables in amplify if you want
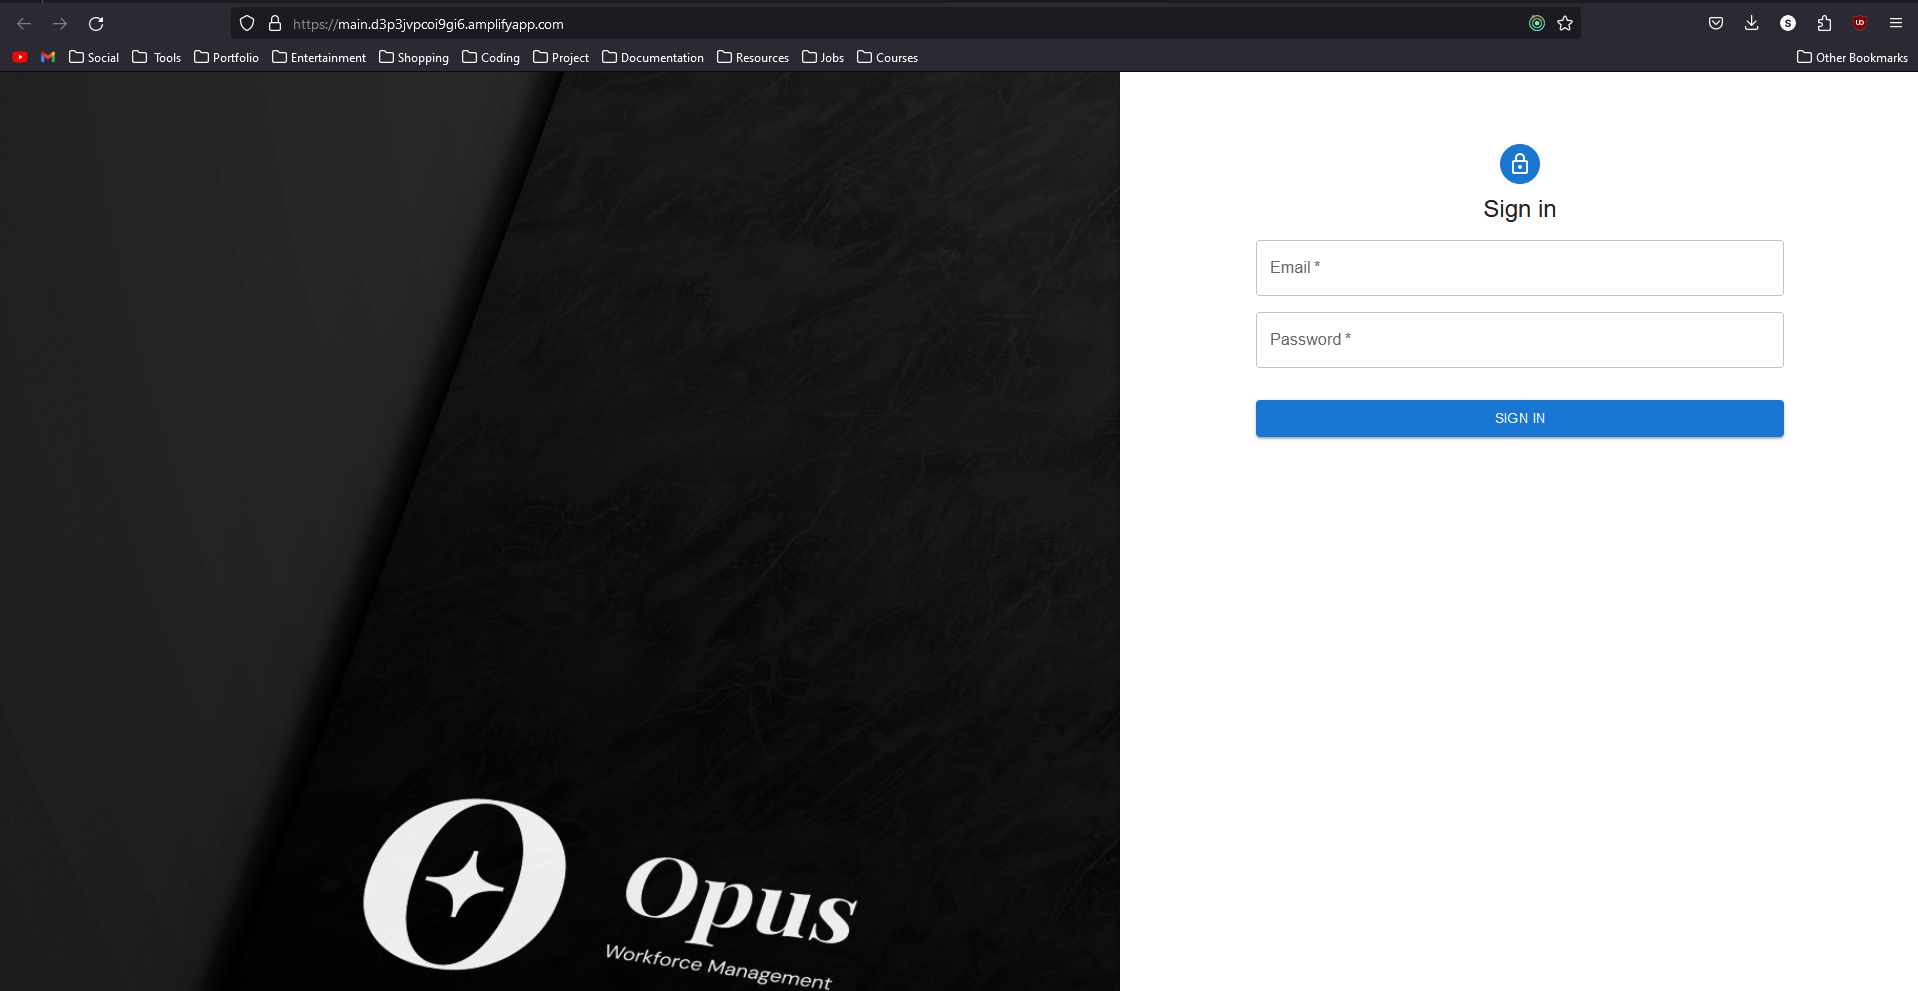
Your app is now live
Conclusion
In conclusion, the journey of deploying a full-stack application on AWS Free Tier was a dynamic exploration that delved into the intricacies of cloud architecture and development. The experience not only involved the successful deployment of MySQL on RDS, Spring on EC2, and React on AWS Amplify but also incorporated a streamlined CI/CD pipeline. The backend server benefited from GitHub Actions, ensuring continuous integration and deployment, while AWS Amplify seamlessly handled the CI/CD for the frontend.
As I reflect on the project, it's clear that the CI/CD setup significantly contributed to the overall efficiency of development and deployment processes. GitHub Actions provided a robust solution for automating backend deployments, while AWS Amplify's integration with the frontend codebase streamlined the continuous delivery workflow. The synergy between these tools not only enhanced the development speed but also facilitated a more consistent and reliable release cycle.
While navigating through the intricacies of AWS services, I gained insights into best practices for cloud development, security considerations, and the critical role of scalability. The process wasn't without its hurdles, but each challenge presented an opportunity for growth and learning.
Sharing these experiences serves not only as a documentation of my journey but also as a guide for fellow developers venturing into the realm of AWS. By reflecting on the lessons learned and embracing the continuous learning ethos of cloud development, I believe the community can benefit from a shared knowledge pool that empowers developers to make informed decisions and build robust, scalable applications on AWS Free Tier.